
By darkscarabcom.
For this tutorial i Will have the worded directions along with the exact keystrokes it takes todo get the step done. If you are Fluent enough with Blender you may not have todo look at the keystrokes line. Each step within the keystrokes line Will be highlighted like this: example. Arrows Will indicate that you should be following a menú Path.
Usually i try todo refrain from making tutorial that have ben done over and over again. Grass is a very popular topic for tutorialesbut in Many cases i find that the tutorialesare lacking in explanation or dont tell you anything more than throwing it on the plane. They leave it up to the user todo spend the time todo search and try todo figure things out for themselves. Well, luckily for you, y write my tutorialesa Little diferently. I like todo tell you more than just the bare Bones steps. Anyways, let get started with it.
basic setup.
Alright, let get the bare basic down here. This is the Stuff you Will find in most tutorialesthat go over Grass/hair/fur in Blender. Ill assume you have Blender opened up and ready todo go. If you have the default Cube, we are going todo kep it, if not, add a Cube todo the scene. Hair in Blender is made th rouge the particle system, so what we want todo do is add particles todo the Cube. To do this we want todo go todo the object settings, into the particles buttons, and add particle todo the Cube.
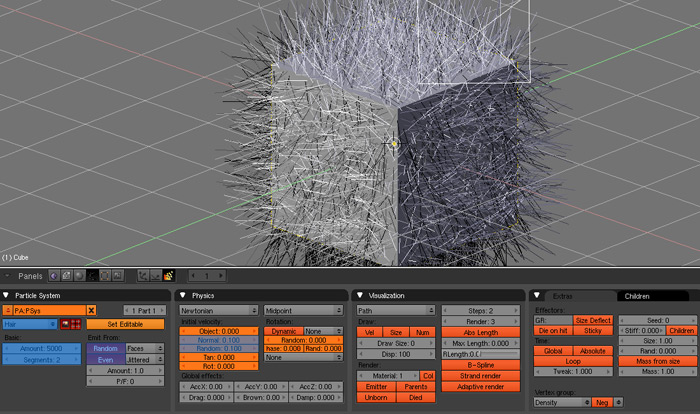
select the Cube, f7 (object settings), go into the particles buttons, click add new;.
In order todo make the particles appear as Hair we only have todo change one more setting. Right under the field that displays the name of the particle system there is a drop down selection. Click on that and you should se that one of the selections is labeled Hair. At this point, nothing should appear in the main screen. What you have todo do is change one of the Many settings for the particle system we just added. Let start out by changing the normal setting todo 0.100, and the random setting todo 0.100. Let a los change the amount todo 5000 and segments todo 2. I a los like todo turn on random and Even, but that is more of a personal preference. Thatll give us a very basic scene.
change particle type todo Hair, change normal todo 0.100, change random todo 0.100, change amount todo 5000.
Change segments todo 2, turn on random and Even;.
If you render your image right now, something that looks like floating nedles Will appear. This isnt exactly Hair or Grass. Let change a few settings so that we can get this todo look a Little better. The first thing we ned todo fix is the fact that our Hair is floating. To fix this, we just want todo go into the particle settings and within the visualization box there is a button with the Word emitter on it. If you select that, our emitter Will appear when we render. Then we want todo add some color todo this. Go ahead and add a material todo our Cube. You can edit your material in any bien you like. I am just going todo make my Hair a light grey color and i Will turn down the specularity todo make it look better.
click on emitter, f5 (shading buttons), go into material buttons, click add new, edit your material;.
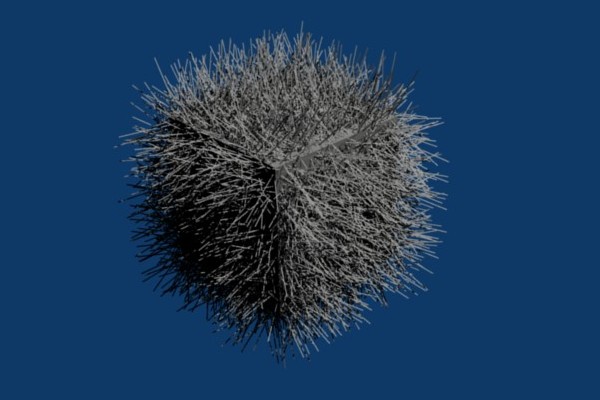
There you go. You now know the basic of making Hair (or Grass or Fur) on an object.
spicing it up.
Now that you know the bare basic, im going todo fill you in on some other things that can be done with your Hair. The first thing that you should know is that you can do just about anything in terms of materiales and textures that you can do with any other object. While it is Fairly simple and intuitive todo just throw up a texture and make the Hair the color that the texture is on the emitter, it is a Little less intuitive todo have each Hair strand have its color change as it goes from the root todo the tip. Below is an image of what i am talking about.
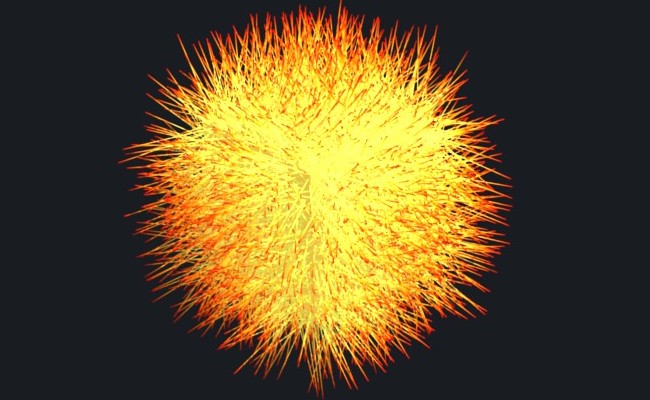
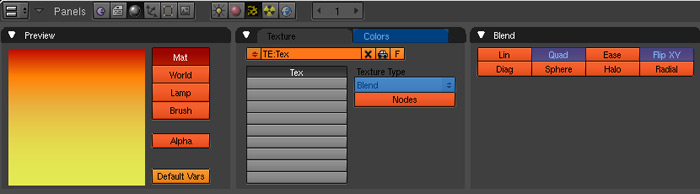
For the most part, doing this sort of thing is done by changing a bunch of diferent settings in a texture that you add todo your Hair. Let get started. Since we already have a material for our Hair, let add a texture. Once you have done that, go into the texture buttons. Under texture type you Will want todo select blend. In the settings that pop up, click flip xy and, this isnt necessary, but i like todo change Lin todo Quad. Then under the colors tab and click on colorband and change the gradiente as much as you want.
click add new texture, change texture type todo blend, click Quad and flip xy, click colorband and edit it;.
Now we ned todo go bak todo your material buttons. In the map input box, change orco todo strand, flat todo Cube, and in the second row of the XYZ rectangle of buttons, change y todo x. After you change those settings, you should be god. When you render you should be able todo se that each strand of Hair Will change color as you go from the surface of the Cube todo the outer tip.
go todo the map input box, change orco todo strand, flat todo Cube, and in the second row of the XYZ rectangle of buttons, change y todo x;.

Another god thing that i would like todo point out are the strand settings, specifically made for Hair. If you look at the enlaces and pipeline box, you should find a grey box labeled strands. In the settings that pop up when you click it, you can change the starting thickness, ending thickness, shape, and a few other things. Rather than going over them, y suggest that you change some settings yourself and find out what they all do. The only thing that i dont like about it is that every time you want todo se the changes you make you have todo take your mouse of of the popup box and the preview image Will update when the box disappears.
Emission points.
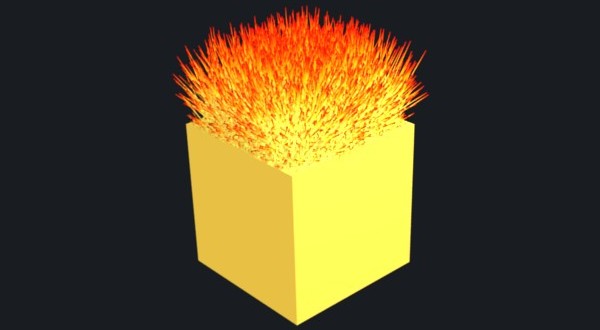
Ok, that was just some pretty Stuff that you can do, but still quite important in my opinión. Let get todo something else you may be looking for. Let say you only want your Hair todo emit from a certain part of the Cube or Whatever object you are using. For this, let make it so that the Hair only comes out of the top of the Cube. I only know of two ways todo do this and that is with a texture and with vertex groups. I like doing vertex groups mainly because that means i dont have todo make a texture just for it. However, the drawbak is that you cannot get as detailed with vertex groups as you can with a texture. Anyways, here is what we are going After:
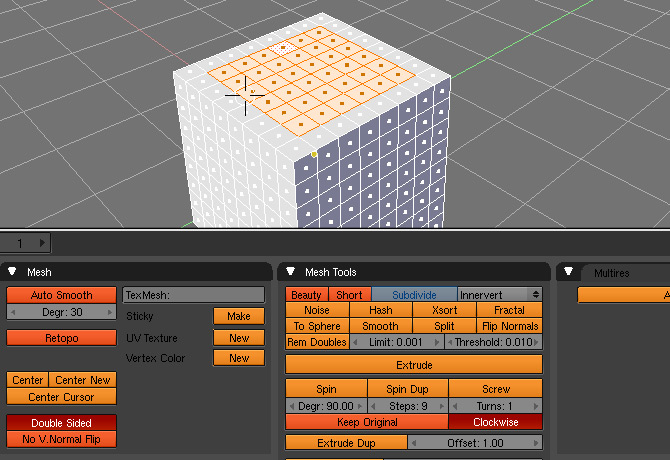
In order todo make this work correctly, we ned todo go into Edit Mode and subdivide our Cube a bit. Otherwise, we Will have some hairs that are going down the side. The reason this does this is that the hairs do not stay within the Boundary of vértices, but stay near them. With some more vértices, we can better control where the Hair appears. I hit the subdivide button in the Mesh tools box 3 times. To make the vertex group that we ned, y selected the Faces on the top of the Cube that do not touch the Edge of the Cube.
subdivide your Cube 3 times, select the top Faces, except the Edges (se below),.
Now that you have your Faces selected for your vertex group you want todo actually assing those Faces todo the group. In the editing buttons and in the enlace and materiales box, there is a Little section for vertex groups. Click on new and then click on assing. This Will assing the selected vértices (that are connected todo the Faces you have selected) todo the new group you just made. If you go out of Edit Mode and into object mode, you should find that all of the Hair is being emitted near the vertex group.
f9 (editing buttons), click new vertex group, click assing, go todo object mode;.
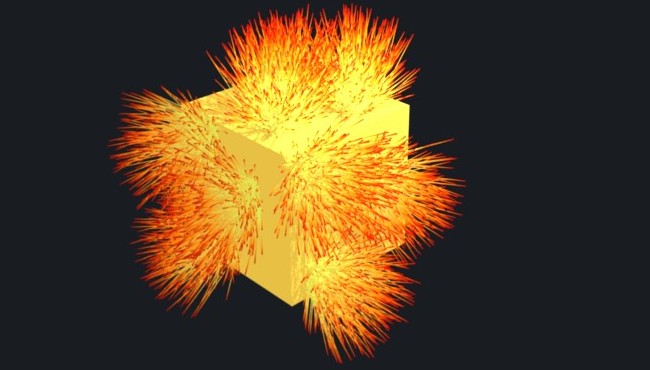
Of course, you can easily expend upon this concept and choose any vértices that you like and put them into a vertex group. They do not have todo be connected todo each other for it todo work. You could just as easily make a splotchy Cube as well:
Playing with your Hair.
Here the last thing i am going todo go over here about your Hair. You can do quite a bit by just changing the settings that are available in particle settings but there are plenty of things you are not able todo do with just those settings. If you go todo the particle buttons there is a button in the particle system box, there is a button that says set editable. Once you have that set up, rather then going into Edit Mode, you want todo go into particle mode. Clicking that button allows you todo manually adjust the vértices just like you would any todo any Mesh.
go todo particle buttons, click set editable, go todo particle mode, edit your Hair;.
Ok, so i admit, editing your Hair in with the usual editing controls isnt that great. But there are some fantastic controls available. In particle mode, there is a menú selection of particle if you click on that, one of the selections in there is particle edit properties. All of the settings there allow you todo easily edit the Hair and Many of the brush settings are pretty self explanatory. I suggest just messing around with the brush types todo get a hang of them.
particle mode, particle->particle edit properties, play with the brush;.

While being able todo do this is great for getting a certain result, there is something you ned todo watch out for. Once you start editing, you cannot change any other particle settings without losing all your changes made while in particle Edit Mode. If you want try todo change something that would cause this, Blender Will warn you by saying Hair is edited. If you do decide todo get out of the particle Edit Mode, click on free edit, the same button that allowed you todo edit the Hair.
By darkscarabcom.
.